Release Candidate (RC) Development
Overview
VisIt normally has two active branches for doing development. The first is develop and the second is the current release candidate. Work performed on the develop branch will go into the next major release, such as 3.1. Work performed on the current release candidate will go into the next minor release, such as 3.0.2. When doing work on the release candidate the normal sequence of operations is as follows:
- A branch is created off the current release candidate.
- Changes are made on the branch.
- A pull request is generated to merge the changes to the current release candidate.
- The changes are then merged into the release candidate.
- A branch is created off of develop.
- The changes from the branch off the release candidate are applied to the branch.
- A pull request is generated to merge the changes to develop.
- The changes are then merged into develop.
In some instances the changes made to the release candidate are not applied to develop, in many instances the exact same changes can be applied to both the release candidate and develop, and in some instannces the changes applied to the two branches are slightly or significantly different.
The rest of the section will go through the steps of the most common case of making the exact same changes to both branches using an example of updating the 3.0.2 release notes on the 3.0RC and develop.
Creating the RC branch
First you checkout the 3.0RC and then create your branch.
git checkout 3.0RC
git checkout -b task/brugger1/2019_09_05_update_release_notes
Making the changes
At this point you would modify your branch as you normally do, modifying, adding or deleting files, and then commiting the changes to the branch.
Creating the pull request on the release candidate
Once you have committed all your changes to the branch you are ready to create the pull request. You will start out by pushing your changes to GitHub as normal.
git push --set-upstream origin task/brugger1/2019_09_05_update_release_notes
Now you go over to GitHub and create your pull request. When creating your pull request, make sure that you are merging it into the release candidate.
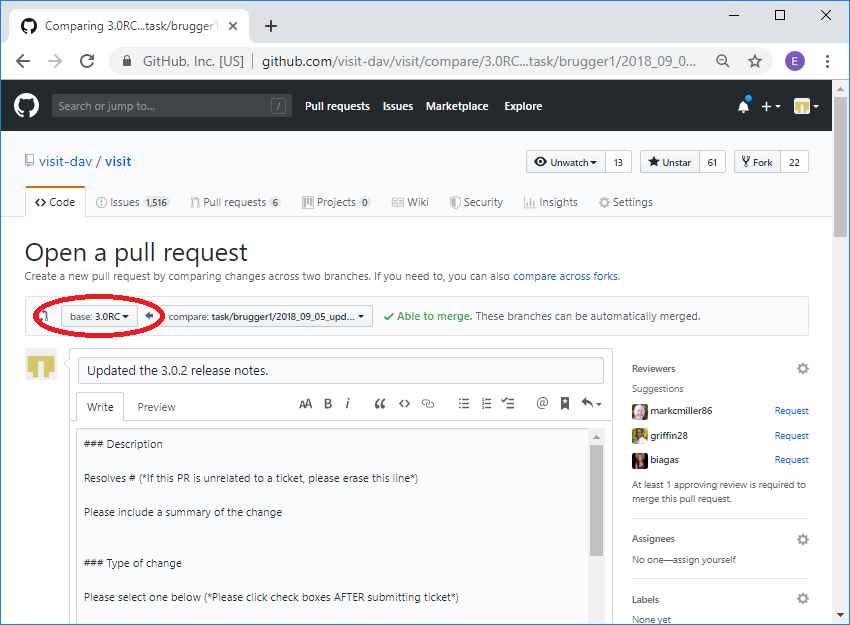
Fig. 6 Merging into the release candidate.
Now you go through the normal pull request process. Once you have merged your changes into the release candidate you can delete the branch at GitHub and locally.
git remote prune origin
git remote update
git checkout 3.0RC
git pull
git branch -D task/brugger1/2019_09_05_update_release_notes
Apply the same changes to develop
You will apply your changes from the 3.0RC to develop by creating a patch
of your changes to the 3.0RC and applying them to a branch created off of
develop. The easiest way to create the patch is immediately after you have
merged your changes into the release candidate before anyone else makes
any changes. In this case you can get the last set of changes from the head.
If someone else has made changes in the mean time you will need to use
the SHA of your merge to the release candidate. When we create the
branch to make the changes on develop, you can use the same name as you
used on the release candidate branch and add _develop. Normally, you
can omit the first two steps below since you presumably just did that a
moment ago.
git checkout 3.0RC
git pull
rm -f patch.txt
git format-patch -1 HEAD --stdout > patch.txt
git checkout develop
git pull
git checkout -b task/brugger1/2019_09_05_update_release_notes_develop
git am -3 < patch.txt
In the case where you need to use the SHA to create the patch, you can get it from the code tab at GitHub for the release candidate branch.
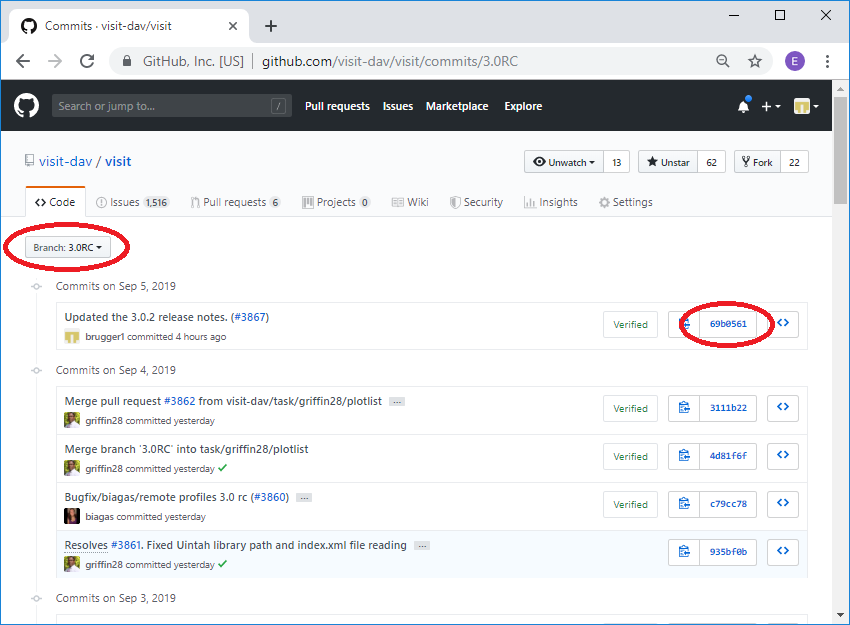
Fig. 7 Getting the SHA for the merge into the release candidate.
The command to create the patch would then look like:
git format-patch -1 69b0561 --stdout > patch.txt
Sometimes conflicts occur when applying the patch. This may happen with frequently updated files such as the release notes. If that happens you will get a message similar to the one below indicating which files had conflicts.
Applying: Updated the 3.0.2 release notes. (#3867)
Using index info to reconstruct a base tree...
M       src/resources/help/en_US/relnotes3.0.2.html
Falling back to patching base and 3-way merge...
Auto-merging src/resources/help/en_US/relnotes3.0.2.html
CONFLICT (content): Merge conflict in src/resources/help/en_US/relnotes3.0.2.html
error: Failed to merge in the changes.
Patch failed at 0001 Updated the 3.0.2 release notes. (#3867)
The copy of the patch that failed is found in: .git/rebase-apply/patch
When you have resolved this problem, run "git am --continue".
If you prefer to skip this patch, run "git am --skip" instead.
To restore the original branch and stop patching, run "git am --abort".
In our case it was the release notes. The file will be modified with
the conflicts highlighted in the normal >>>>>>>>, =========, and
<<<<<<<< notation. You can go in and edit the files and then do a
git add for each file that was in conflict. After that point you can
do a git am --continue.
vi src/resources/help/en_US/relnotes3.0.2.html
git add src/resources/help/en_US/relnotes3.0.2.html
git am --continue
Now you changes will have been commited to the branch with the appropriate commit message. You are now ready to push the change to GitHub and create a new pull request.
Creating the pull request for develop
You first push your changes to GitHub as normal.
git push --set-upstream origin task/brugger1/2019_09_05_update_release_notes_develop
Now you go over to GitHub and create your pull request. When creating your pull request, make sure that you are merging it into develop.
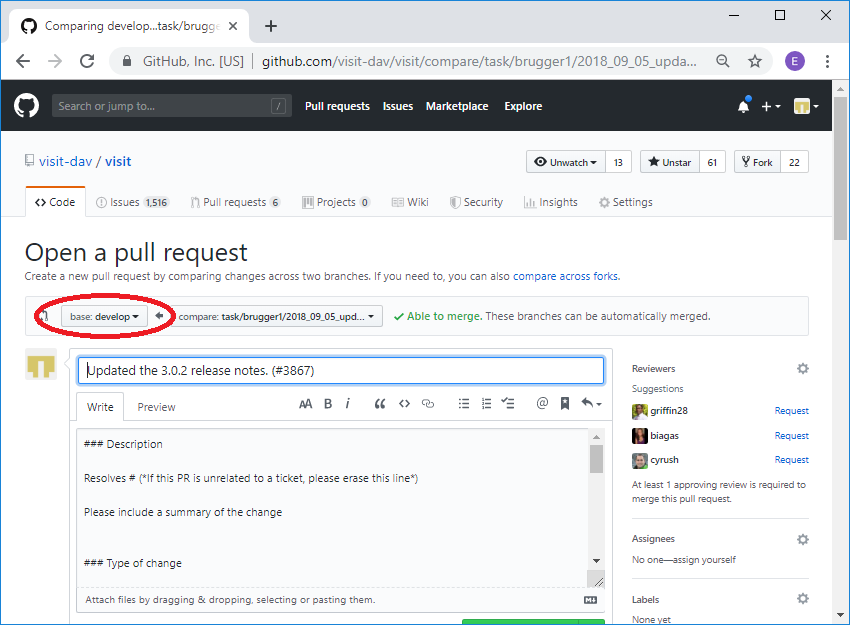
Fig. 8 Merging into develop.
In the description you can simply say that you are merging from the release candidate into develop rather than providing all the normal pull request information. If you are resolving an issue, you will want to mention that, since the automatic closing of issues only happens when you merge into develop.
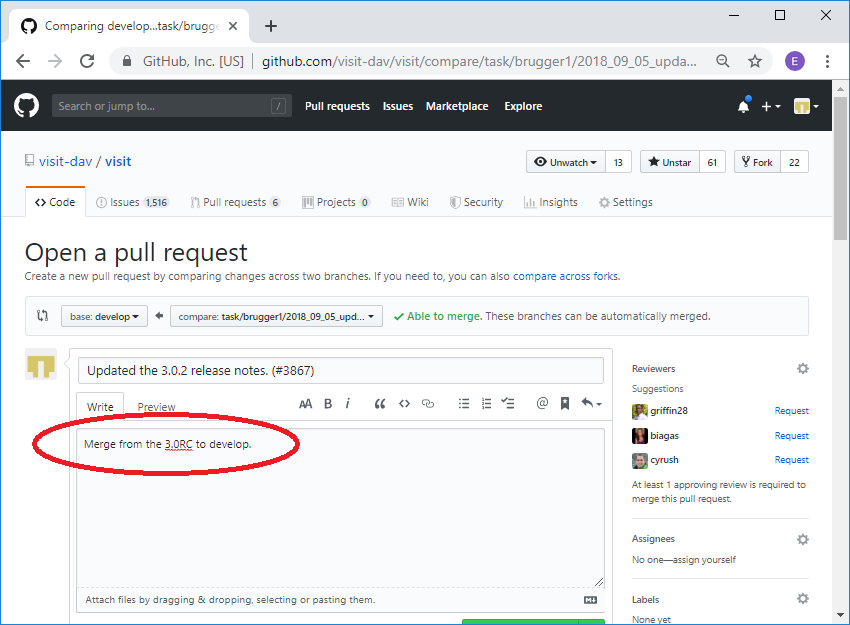
Fig. 9 The pull request with the abbreviated description.
Now you go through the normal pull request process. Once you have merged your changes into develop you can delete the branch at GitHub and locally.
git remote prune origin
git remote update
git checkout 3.0RC
git pull
git branch -D task/brugger1/2019_09_05_update_release_notes_develop
That’s it. You have now made the exact same change to both the 3.0RC and develop.