14. Compute Engines
VisIt can have many compute engines running at the same time. Much of the time the compute engines are those that are installed with VisIt but on occasion, simulation codes may be instrumented to act as VisIt compute engines capable of performing visualization operations on simulation data as it is created. When a simulation is used as a VisIt compute engine, VisIt can access data directly from the simulation without the need to translate data into another format or write it out to disk. When simulations are instrumented to become VisIt compute engines, they have all of the capabilities of a standard VisIt compute engine and more. Specifically, simulations can accept additional simulation-defined control commands that direct them to perform actions such as writing a restart file. Since simulations offer extra capabilities over a normal VisIt compute engine, VisIt provides different windows in order to manage them. To manage compute engines and check on progress, VisIt provides a Compute Engine Window. VisIt provides the Simulation Window to manage simulations, display their progress, and provide extra controls for the simulations.
14.1. Compute Engines Window

Fig. 14.1 Compute Engines Window
You can open the Compute Engines Window, shown in Figure 14.1, by selecting the Compute engines option from the Main Window’s File menu. The main purpose of the Compute Engines Window is to display the progress of a compute engine as it completes a task. The window has two status bars. The top status bar indicates the progress of the overall task. The bottom status bar indicates that compute engine’s progress through the current processing stage. The window also provides buttons for interrupting and closing compute engines, as well as an Engine Information Area that indicates how many processors the engine uses and its style of load balancing.
14.1.1. Picking a compute engine
The Compute Engines Window has the concept of an active compute engine. Only the active compute engine’s progress is displayed in the status bars. The active compute engine is also the engine that is interrupted or closed. To pick a new active compute engine, choose a compute engine name from the Engine menu. The Engine menu contains the names of all compute engines that VisIt is running.
14.1.2. Interrupting a compute engine
Some operations in VisIt may take a long time to complete so most computations are broken down into stages. In the event that you do not want to wait for an operation to complete, or if you realize that you made a mistake, you can interrupt a compute engine. When you click the Interrupt engine button a signal is sent to the compute engine that tells it to stop its work. The compute engine handles the interrupt requests after it completes the current stage so there can be a small delay before the compute engine is interrupted. Any plots being generated when a compute engine is interrupted are sent into the error state and are listed in red in the Plot list until they are regenerated.
14.1.3. Closing a compute engine
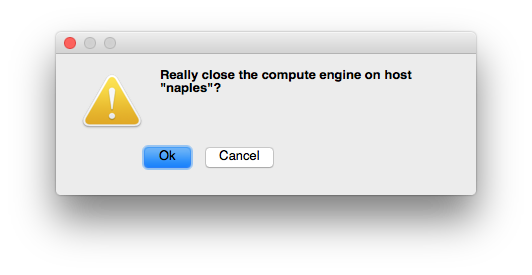
Fig. 14.2 Close compute engine confirmation dialog
You can close a compute engine when you no longer need it by clicking the Close engine button. The compute engine is closed only after you click Yes in a confirmation dialog window.
14.1.4. Clearing a compute engine’s cache
As the compute engine processes data, it caches calculation results in case they are needed again. This includes meshes and variables that have been read from databases as well as the results from more complicated calculations involving expressions and operators. VisIt’s compute engine periodically clears the cache of items that it no longer needs but if you want to explicitly clear the cache to free up more memory, you can click the Clear cache button in the Compute Engine Window.
14.2. Simulation Window
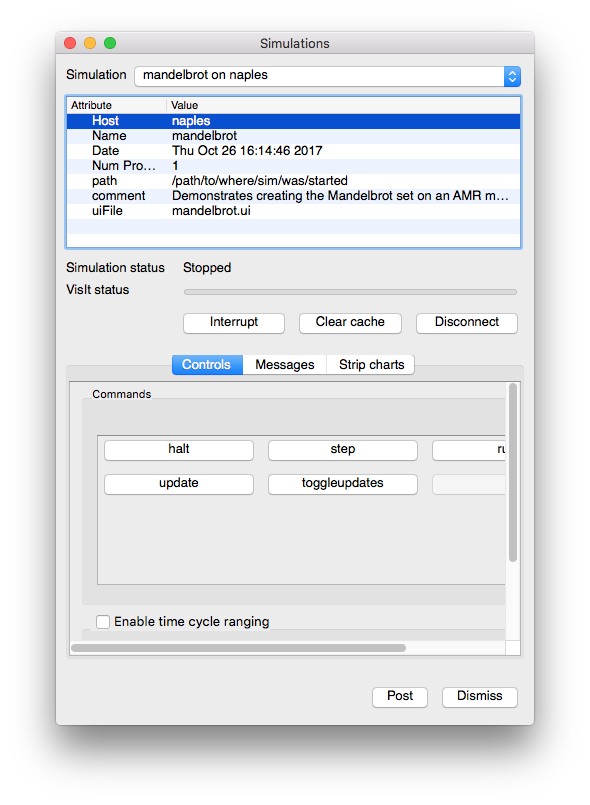
Fig. 14.3 Simulation Window
You can open the Simulation Window, shown in Figure 14.3, by selecting the Simulations option from the Main Window’s File menu. The main purpose of the Simulation Window is to display the progress of a simulation that is acting as a VisIt compute engine as it completes its visualization tasks. The Simulation Window also provides buttons that direct the simulation to perform simulation-defined commands such as saving out a restart dump. The list of commands depends on the functionality that the simulation exposes to VisIt when instrumented.
The Simulation Window is divided up into two main areas. The top of the window, called the Simulation attributes area, displays various attributes of the simulation such as its name, when it was started, the name of the computer where it is running, the number of processors, etc. Below the Simulation attributes area, you will find controls that are also present in the Compute Engines Window such as the Interrupt button and Clear cache button. The Disconnect button is specific to the Simulation Window and when you click it, VisIt will detach from the running simulation, allowing it to continue its calculation. You can reconnect to the simulation later to check on the its progress or create more visualizations.
Below the Simulation attributes area, you can access Commands, Messages, and Strip Charts. The Commands tab displays buttons for simulation-defined commands. When a simulation is instrumented to act as a VisIt compute engine, it publishes a list of commands that it will accept when connected to VisIt. This allows the simulation to provide hooks that allow the user to tell the simulation to execute certain commands like writing a restart file. Depending on the complexity of the commands exposed, VisIt could ultimately be used to steer the simulation as well as visualize its results. The Messages tab displays messages from the simulation. The Strip Charts tab shows traces of specific quantities published from the simulation to VisIt.