3.2. Configuring With CMake GUI
Run cmake-gui.exe, which will display this window. Figure 3.78
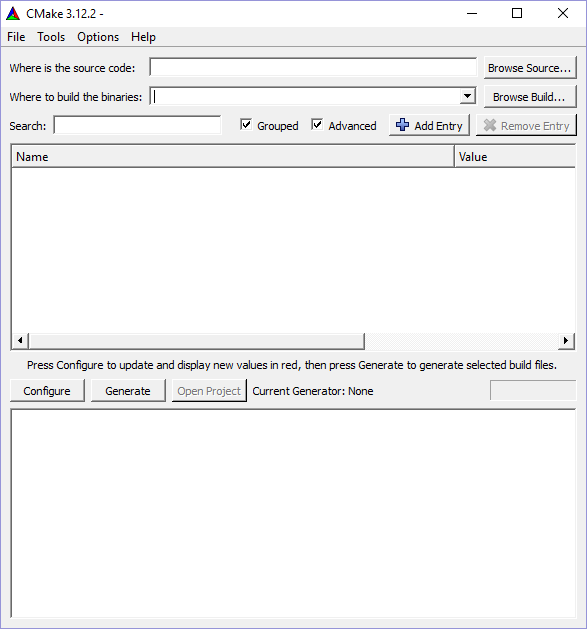
Fig. 3.78 CMake-gui
3.2.1. Locating Source and Build Directories
Fill in the location of VisIt’s src directory in the Where is the source code: section.
Then tell CMake where you want the build to go by filling in Where to build the binaries. It is best to create a new build directory somewhere other than inside the src or windowsbuild directories. This is called out-of-source build and it prevents pollution of your src directory.
The Browse buttons come in handy here.
If you are building from a clone of the github repository, it is recommended to do the build in a directory outside the repo (eg peer to visit) to keep your checkout clean. Figure 3.79
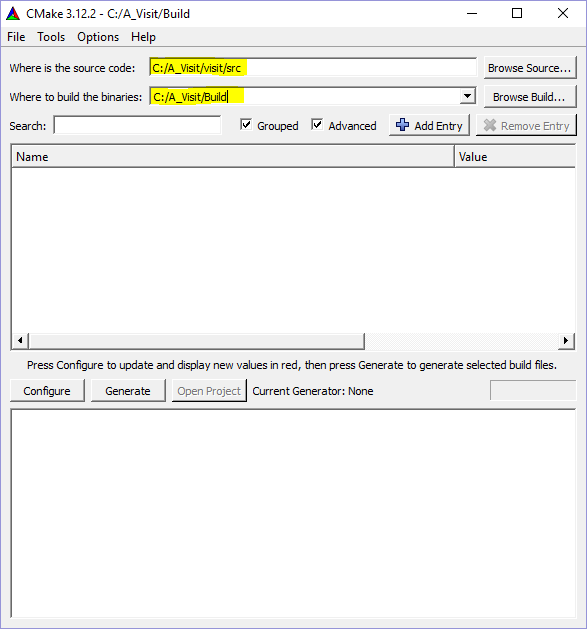
Fig. 3.79 Setting source and build directories
3.2.2. Location of windowsbuild Directory
For a released version of VisIt’s source code, the windowsbuild directory containing the prebuilt third party binaries is located peer to src. CMake generation should locate this directory automatically. Figure 3.80
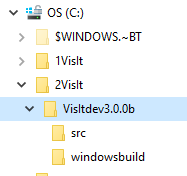
Fig. 3.80 Directory structure with source from a released version
In order for CMake to locate the directory automatically for a development build cloned or downloaded from the github repositories, visit-deps should be peer to visit. Figure 3.81
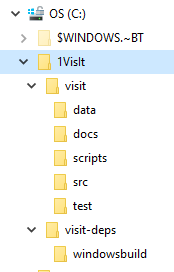
Fig. 3.81 Expected directory structure with source from GitHub repo
If neither of the above is true for your situation, use the CMake gui to set VISIT_WINDOWS_DIR to the location of the windowsbuild directory. Figure 3.82
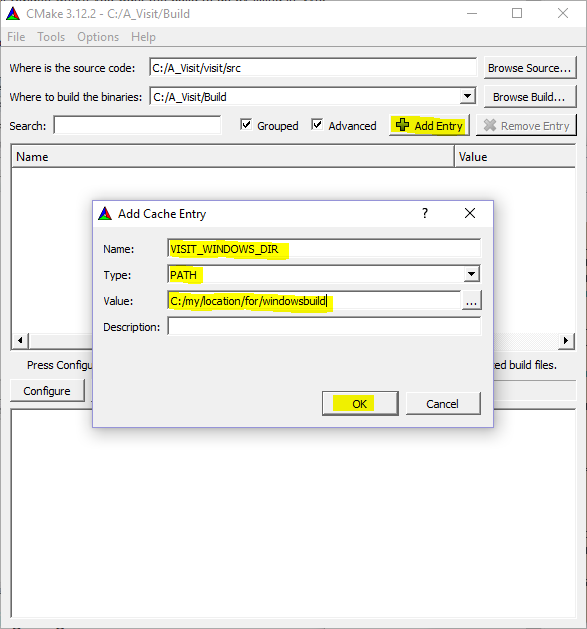
Fig. 3.82 Setting VISIT_WINDOWS_DIR
3.2.3. Limiting Plugins
By default, most of the supported database reader plugins are built, which can slow down loading of the solution in the Visual Studio IDE, and slow down the build. If you want to reduce the number of plugins built, add a CMake var using the Add Entry Button. If you are producing a version of VisIt that you plan to distribute, you should skip this step so all database reader plugins are built. Figure 3.83
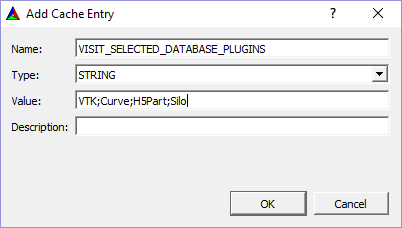
Fig. 3.83 Selecting a limited number of database plugins
To limit the database plugins to a specific set of plugins, set the Name: to VISIT_SELECTED_DATABASE_PLUGINS. The Type: should be STRING. The Value: should be a ‘;’ separated list of database plugin names. Case must match the name of the folder in /src/databases.
The same procedure applies to plots and operators. The VisIt CMake variables to limit plots and operator plugins are VISIT_SELECTED_PLOT_PLUGINS and VISIT_SELECTED_OPERATOR_PLUGINS, respectively.
Click OK when finished.
3.2.4. Configuring
Before configuring, you may want to suppress warnings. From the Options menu, choose Warnings. Check the Developer Warnings and Deprecated Warnings in the Suppress Warnings section. Click OK. Figure 3.84
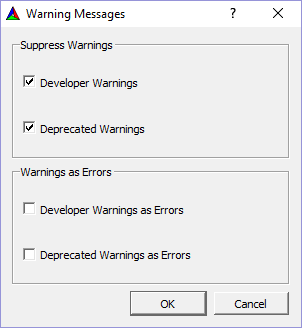
Fig. 3.84 Suppress CMake warnings
In the main CMake Window, click the Configure button.
If the build directory does not exist, you will be prompted to allow its creation.
You will also be prompted to choose a generator. On Windows, this corresponds to the version of Visual Studio for which you plan to generate a solution and projects.
Currently, only Visual Studio version 2017 64-bit is supported by the prebuilt third party libraries. Choose Visual Studio 15 2017 Win64 from the generator dropdown. Choose x64 from the dropdown for the Optional platform. Then enter host=x64 in the Optional toolset to use the full 64-bit toolset. Figure 3.85
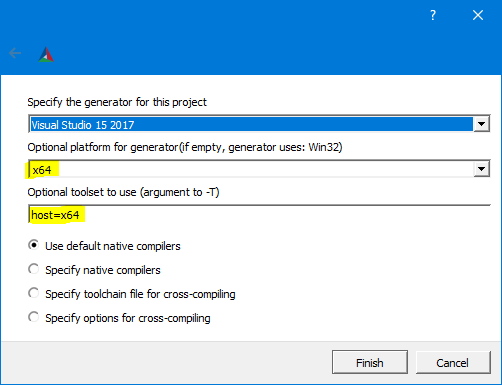
Fig. 3.85 Choosing the generator
CMakeCache entries will be displayed after the initial configure. All entries at this point will be highlighted reddish orange – a signal that you may want to modify some of them. Subsequent clicks of the Configure button highlight only entries that contain errors or entries that are new since the last configure.
You can modify how many entries are seen, and how they are viewed by selecting the: Grouped, and/or Advanced buttons. Grouped option groups similarly named items, Advanced option shows all the entries. Using both is probably the easiest to navigate for use with VisIt. Mouse-hover over individual entries (not groups) will generate a brief description. Figure 3.86
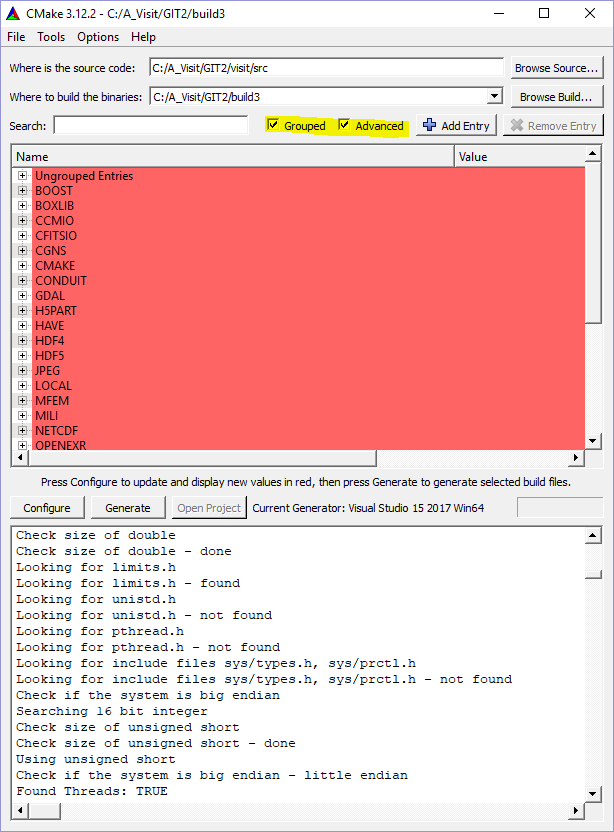
Fig. 3.86 After first configure
Most of the default settings should be fine, though you may want to change CMAKE_INSTALL_PREFIX from its default location within the Build directory. If you’ve grouped the entries, click the + button next to CMAKE, find CMAKE_INSTALL_PREFIX and modify it as desired.
See CMake Variables for a comprehensive list of settings that can be modified to control aspects of the build.
3.2.5. Parallel
If you have an MPI implementation installed (Microsoft’s MPI), you can choose to create a parallel build. Expand the VISIT section within the CMake gui, then check the box for VISIT_PARALLEL. You will have to scroll to find it.
Click the Configure button again to have CMake check the prerequisites for building parallel VisIt. If the prerequisites are met then some new cache entries related to MPI will be created. If not, the MPI entries may have to be modified by hand.
3.2.6. Suppressing Regeneration
The solution file that CMake creates has a project called ZERO_CHECK that is occasionally invoked to regenerate the projects. This can be highly undesirable during development, since it may be triggered during a build and can cause numerous projects to be reloaded into the VS IDE, wasting time unnecessarily. To avoid this behavior, you can create a new CMake cache entry named CMAKE_SUPPRESS_REGENERATION, with type BOOL and make sure that it is checked. If you made this change click Configure again.
- You can automate this step in your host.cmake file by adding this line to your host.cmake file:
set(CMAKE_SUPPRESS_REGENERATION TRUE)
Note that setting this flag means that CMake won’t automatically reconfigure from within the VS IDE when changes are made to the build scripts (CMakeLists.txt) or Cache entries. You will have to manually reconfigure. Once reconfigured, Visual Studio will notify you the project files have been modified and prompt you to reload.
3.2.7. Generate
The Generate step creates the Visual Studio project and solution files. Make sure any changes made to the cache entries have been Configured and that no entries remain red, then click the Generate button.
3.2.8. Compile
Open the generated VisIt.sln file with Visual Studio (it may take awhile to load all the project files). Select the desired Configuration and Build the solution.
Note: if VISIT_CREATE_XMLTOOLS_GEN_TARGETS is ON, choose the ALL_BUILD project to build instead of the Solution. More information on this variable can found in the CMake Variables section.