13.1. Client-Server Mode
When you run VisIt locally, you usually select files and create plots using the open database. Fortunately, the procedure for running VisIt in client-server mode is no different than it is for running in single-computer mode. You begin by launching the File Open Window and typing the name of the computer where the files are stored into the Host text field.
Once you have told VisIt which host to use when accessing files, VisIt launches the VisIt Component Launcher (VCL) on the remote computer. The VCL is a VisIt component that runs on remote computers and is responsible for launching other VisIt components such as the metadata server (mdserver) and compute engine. (Figure 13.1). Once you are connected to the remote computer and VCL is running, you won’t have to enter a password again for the remote computer because VCL stays active for the life of your VisIt session and it takes care of launching VisIt components on the remote computer.
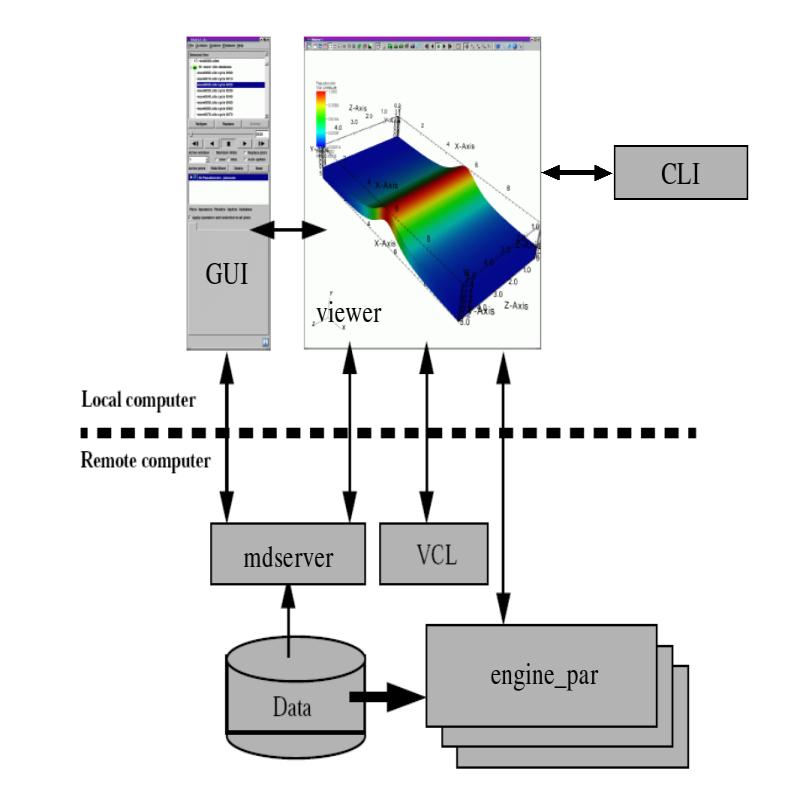
Fig. 13.1 VisIt’s Architecture
If VCL was able to launch on the remote computer and if it was able to successfully launch the metadata server, the files for the remote computer will be listed in the Files pane of the File Open Window, just as if you were running locally. You then select the file or virtual database and click OK. Now that you have files from the remote computer at your disposal, you can create plots as usual.
13.1.1. Passwords
Sometimes when you try to access files on a remote computer, VisIt prompts you for a password by opening a Password Window (Figure 13.2). If you are prompted for a password, type your password into the window and click the Ok button. If the password window appears and you decide to abort the launch of the remote component, you can click the Password Window’s Cancel button to stop the remote component from being launched.
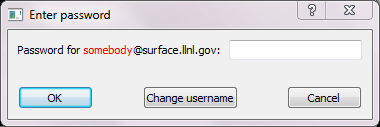
Fig. 13.2 Password Window
If your username for the remote machine is not listed correctly, you can click on the Change username button and a new window will pop up allowing you to enter the proper username for the remote system. (Figure 13.3). Enter the correct username in the text field provided and click Confirm username. Proceed with entering the password in the Password Window.
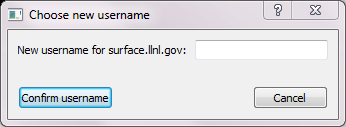
Fig. 13.3 Change Username Window
VisIt uses ssh for authentication and you can set up ssh so that passwords are not required. This is called passwordless ssh and once it is set up for a computer, VisIt will no longer need to prompt for a password.
13.1.2. Setting Up Password-less SSH
The following instructions describe how to set up ssh to allow password-less authentication among a collection of machines.
13.1.2.1. On the Local Machine
If you do not already have a ~/.ssh/id_rsa.pub file, generate the key:
cd

ssh-keygen -t rsa
Accept default values by pressing <Enter>. This will generate two files, ~/.ssh/id_rsa and ~/.ssh/id_rsa.pub. The ~/.ssh/id_rsa.pub file contains your public key in one very long line of text. This information needs to be concatenated to the authorized_keys file on the remote machine, so copy it to a temp file on the remote machine:
scp ~/.ssh/id_rsa.pub <your-user-name>@<the.remote.machine>:tmp
13.1.2.2. On the Remote Machine
If you do not already have a ~/.ssh directory, create one with r-w-x permission for the owner only:
cd

mkdir .ssh

chmod 700 .ssh
If you do not already have a ~/.ssh/authorized_keys file, create an empty one with permission for the owner only:
cd ~/.ssh

touch authorized_keys

chmod 600 authorized_keys
Concatenate the temporary file you copied into authorized_keys:
cd ~/.ssh

cat authorized_keys ~/tmp > authorized_keys

rm ~/tmp
13.1.2.3. Completing the Process
If you have more remote machines you want to access from the same local machine using passwordless ssh, repeat the process starting with copying the ~/.ssh/id_rsa.pub file from the local machine to the remote, and continuing from there.
You can also repeat the above sections, reversing the local and remote machines, in order to allow passwordless ssh to the local machine from the remote machine.
13.1.3. Environment
It is important to have VisIt in your default search path instead of specifying the absolute path to VisIt when starting it. This is not as important when you run VisIt locally, but VisIt may not run properly in client-server mode if it is not in your default search path on remote machines. If you regularly run VisIt using the network configurations provided for LLNL computers then VisIt will have host profiles, which are sets of information that tell VisIt how to launch its components on a remote computer. The provided host profiles have special options that tell the remote computer where it can expect to find the installed version of VisIt so it is not required to be in your path. If you did not opt to install the provided network configurations or if you are at a site that requires other network configurations then you will probably not have host profiles by default and it will be necessary for you to add VisIt to your path on the remote computer. You can add VisIt to your default search path on Linux systems by editing the initialization file for your command line shell.
13.1.4. Launch Progress Window
When VisIt launches a compute engine or metadata server, it opens the Launch Progress Window when the component cannot be launched in under four seconds. An exception to this rule is that VisIt will always show the Launch Progress Window when launching a parallel compute engine or any compute engine on macOS. VisIt’s components frequently launch fast enough that it is not necessary to show the Launch Progress Window but you will often see it if you launch compute engines using a batch system.
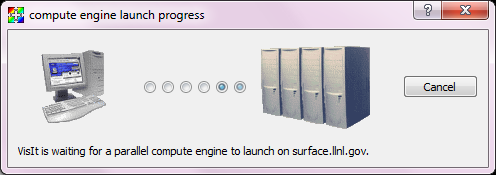
Fig. 13.4 Launch Progress Window
The Launch Progress Window indicates VisIt is waiting to hear back from the component being launched on the remote computer and gives you some indication that VisIt is still alive by animating a set of moving dots representing the connection from the local computer to the remote computer. The icon used for the remote computer will vary depending on whether a serial or parallel VisIt component is being launched. The Launch Progress Window for a parallel compute engine is shown in Figure 13.4. The window is visible until the remote compute engine connects back to the viewer or the connection is cancelled. If you get tired of waiting for a remote component to launch, you can cancel it by clicking the Cancel button. Once you cancel the launch of a remote component, you can return to your VisIt session. Note that if the remote compute is a parallel compute engine launched via a batch system, the engine will still run when it is finally scheduled but it will immediately die since VisIt has stopped listening for it. On heavily saturated batch systems, it might be prudent for you to manually remove your compute engine job from the queue.