8.7. Data-Level Comparisons Wizard
The data-level comparisons wizard facilitates creation of expressions that can be used when comparing fields on different meshes and/or in different databases. Such expressions are also known as Cross-Mesh Field Evaluation (CMFE) expressions because they effectively take a field defined on one mesh and evaluate it (e.g. map it) onto a new mesh. The data-level comparisons wizard is a very helpful alternative to entering CMFE expressions directly into the expression system manually.
These expressions involve the concepts of a donor variable and a target mesh. The donor variable is the variable to be mapped onto a new mesh. The target mesh is the mesh onto which the donor variable is to be mapped. In addition, the term donor mesh refers to the mesh upon which the donor variable is defined. Also, the target mesh is always interpreted as a mesh in the currently active database. Data-level comparison expressions (CMFEs) are always mapping data from other meshes, possibly in other databases onto a target mesh which is understood to be in the currently active database.
To start the wizard, go to Controls->Data-Level Comparisons… as shown in Figure 8.84.
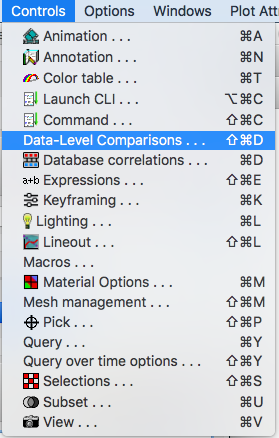
Fig. 8.84 Starting the Data-Level Comparisons Wizard
This will open the initial window where the user is asked to choose between a few basic varieties of CMFE expressions. These differ in the relative locations (e.g. which database) of the donor variable and target mesh.
Donor variable and target mesh are in the same database.
Donor variable and target mesh are from different timestates of the same database.
Donor variable and target mesh are in wholly different databases.
Note: if you wish to create a CMFE that works properly across a time series with wholly different databases (3rd case above), the data-level comparisons wizard does not directly support that. However, you can use wizard to construct an initial CMFE expression and then edit it manually in the Expression Window to adjust it for a time series following the documentation on donor variable syntax.
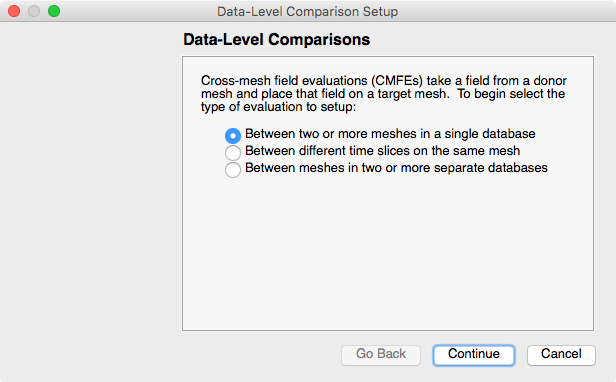
Fig. 8.85 Selecting among varieties of CMFE expressions
If the user is unsure, selecting the last option is usually fine. There are some simplifications and maybe some small performance optimizations in the creation and evaluation of the expressions that can be made for the other cases. But, VisIt will operate fine even if those are not chosen. In the description that follows, we demonstrate only this selection but describe variations where necessary.
After selecting the variety of CMFE expression to create, the user is presented with the next wizard window to specify the target mesh and donor variables to be used in the expression.
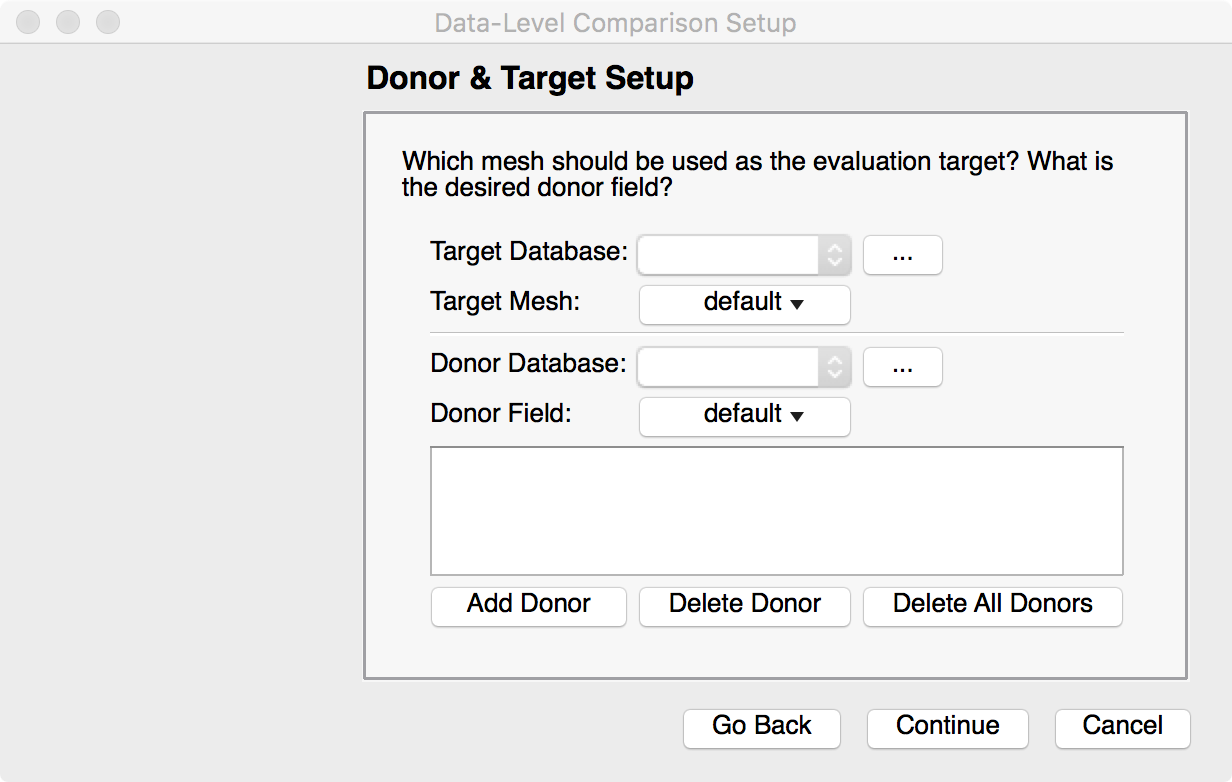
Fig. 8.86 Setting up the target mesh and donor variables
The target mesh selection will present the user with a pull-down list of currently opened databases with the currently active database in the list selected. If another database is desired, the user may either select it from among the pull-down list of currently open databases or, if the database is not yet open, press the ellipsis (3 dots) button next to the database selection list to open a file browser and navigate to the desired database in the file system as shown in Figure 8.87
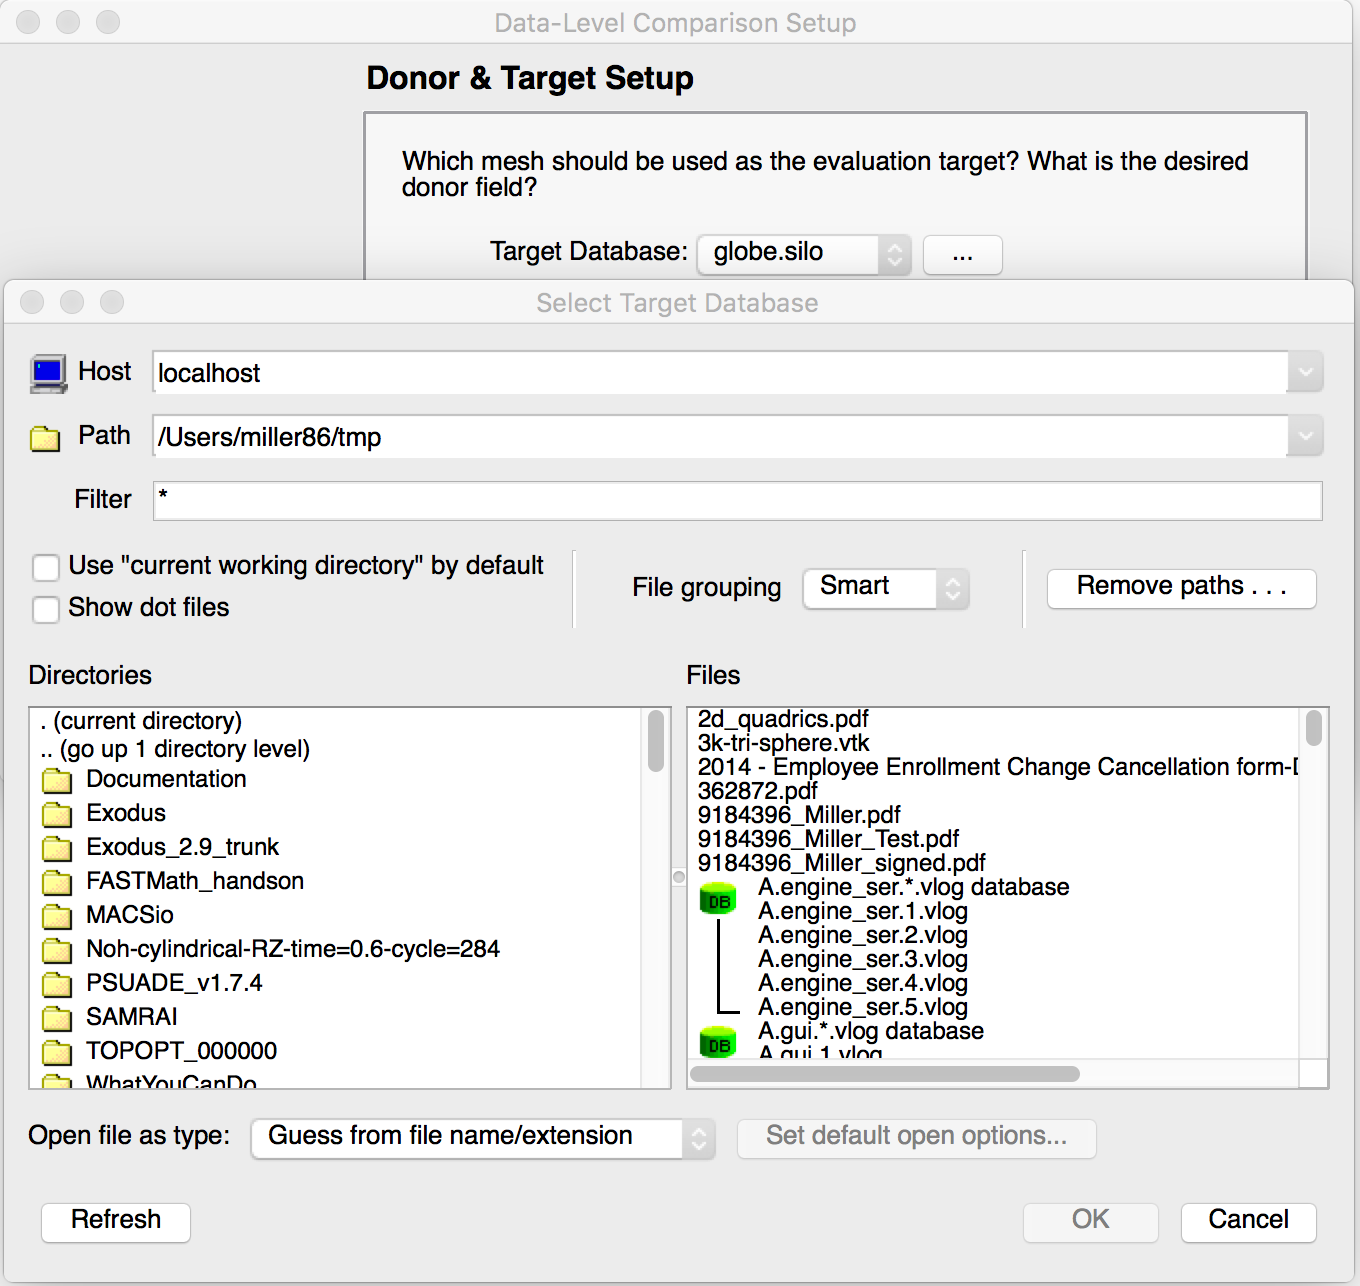
Fig. 8.87 Setting up the target mesh and donor variables
Once the database of the target mesh is specified, the target mesh within that database is specified with the Target Mesh: pull down list.
A similar sequence of steps is followed for specifying the donor variable. The example in Figure 8.88 demonstrates the selection of a specific donor variable from the donor database with the Donor Variable: pull down list.
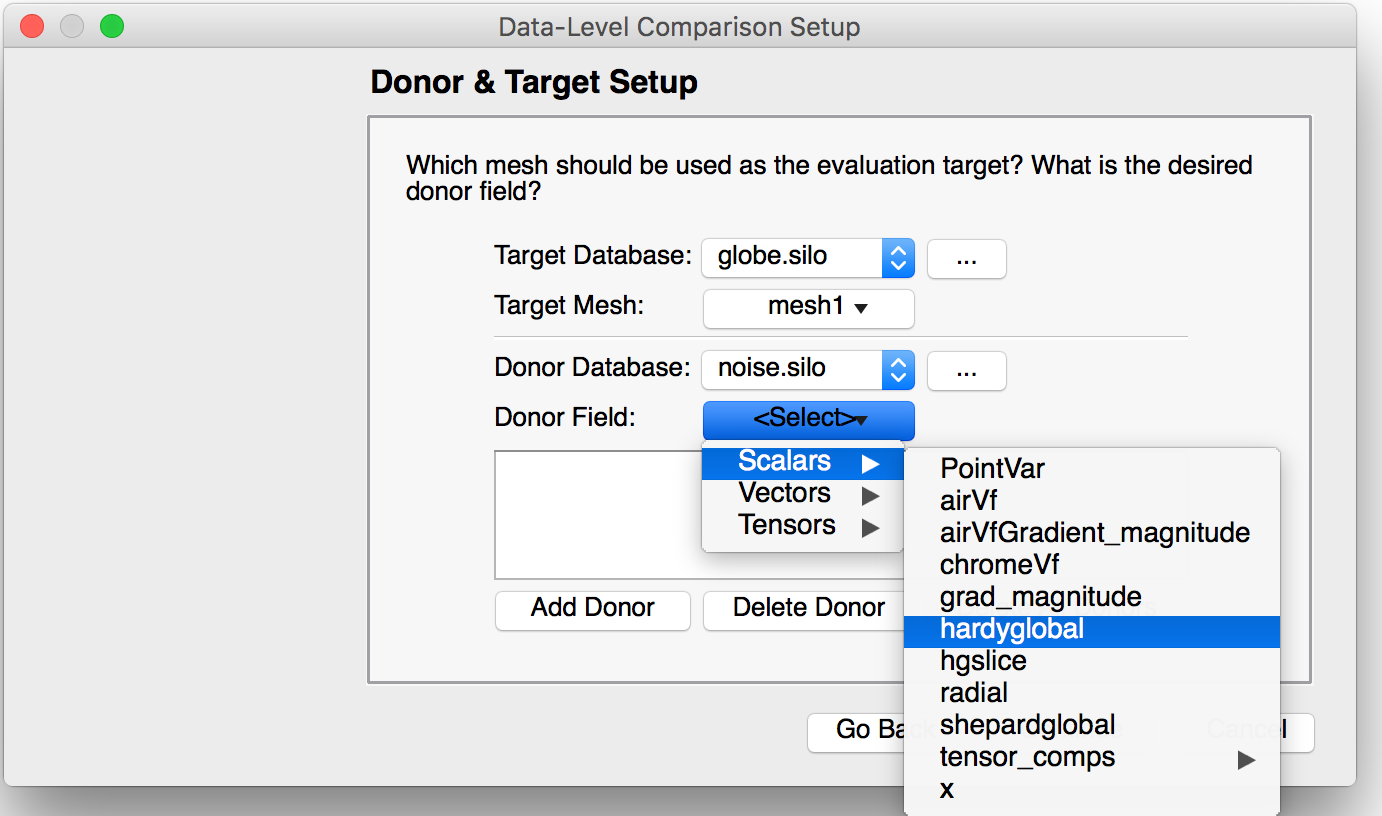
Fig. 8.88 Selecting a specific variable from a database
Next, the user is presented with a window to specify the manner in which the CMFE expression is to be evaluated. The choices are either connectivity-based or position-based. A position-based CMFE is a more general evaluation at the likely expense of lower performance. When in doubt, it is best to use this option. Connectivity-based evaluation is applicable only when donor and target meshes are one-for-one both topologically and geometrically. In this case, VisIt can optimize the evaluation and avoid having to deal with cases where the donor and target meshes do not wholly overlap.
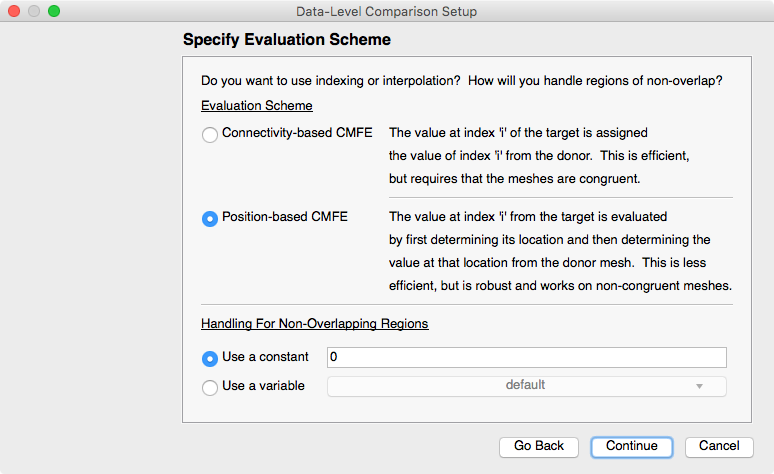
Fig. 8.89 Selecting the mode of evaluation
For a position-based CMFE, the user is required to also specify what VisIt should do for those positions on the target mesh that do not overlap with the mesh of the donor variable. The user can choose either a constant numerical value (e.g. a fill value) or can specify a variable already defined on the target mesh. It is possible for the user to make a choice that either enhances or inhibits one’s ability to distinguish between values in the result that come from the donor and values that come from the selected fill choice. A common practice is to choose a constant value that is an extremum of the donor variable’s range. For example, if the donor variable has a maximum value of 25.7, then selecting this as the constant to use for non-overlapping regions in the CMFE has the benefit of not altering the variable’s range but then also being indistinguishable from real data. Another practice is to choose a value that is easily distinguishable and later apply a threshold operator to remove those portions of the result.
The final step in the wizard is to give the result variable a name and then decide what to do with the result variable. In Figure 8.90, we have given the result variable the name hardyglobal_onto_mesh1_from_globe.
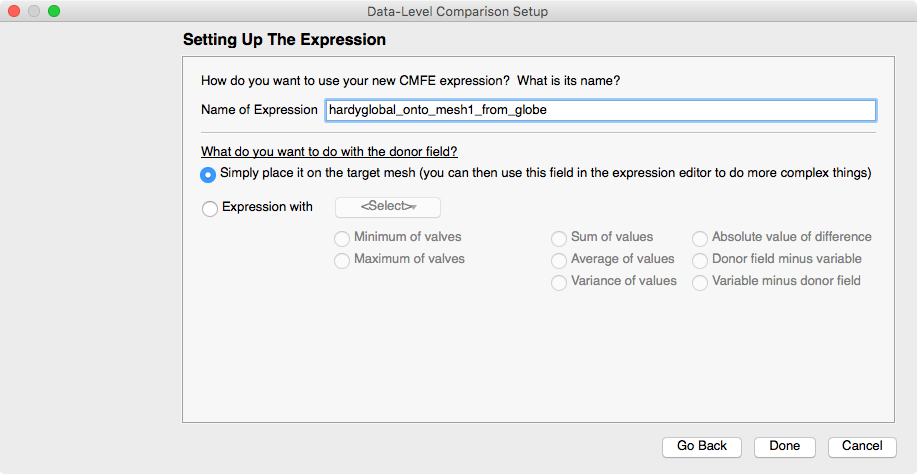
Fig. 8.90 Selecting result variable name and comparison method
Often, it is sufficient to have VisIt just compute the mapped variable and then allow the user to use the result variable in other expressions. However, for convenience, the wizard also offers a number of options common to the work of comparing the mapped variable to another variable. This last window in the wizard allows the user to select from among several common methods for comparing the mapped variable to another variable on the target mesh. By selecting the Expression with option, the user is then offered the ability to select a variable already defined on the target mesh from the pull down list. Then, the user can select from one of several common methods for comparing the two variables. For example, the Absolute value of difference choice will have the effect of creating a single expression that computes the difference in the donor and selected variables and then take its absolute value.
At any point during the steps in the wizard, the user can hit the Go Back button to go back and make different choices. The user completes the wizard by hitting the Done button. There is no way to go back after hitting the Done button. Upon completion of the wizard, a new expression is created according to user’s selections. This new expression can be edited in the expression window, like any other expression as illustrated in Figure 8.91
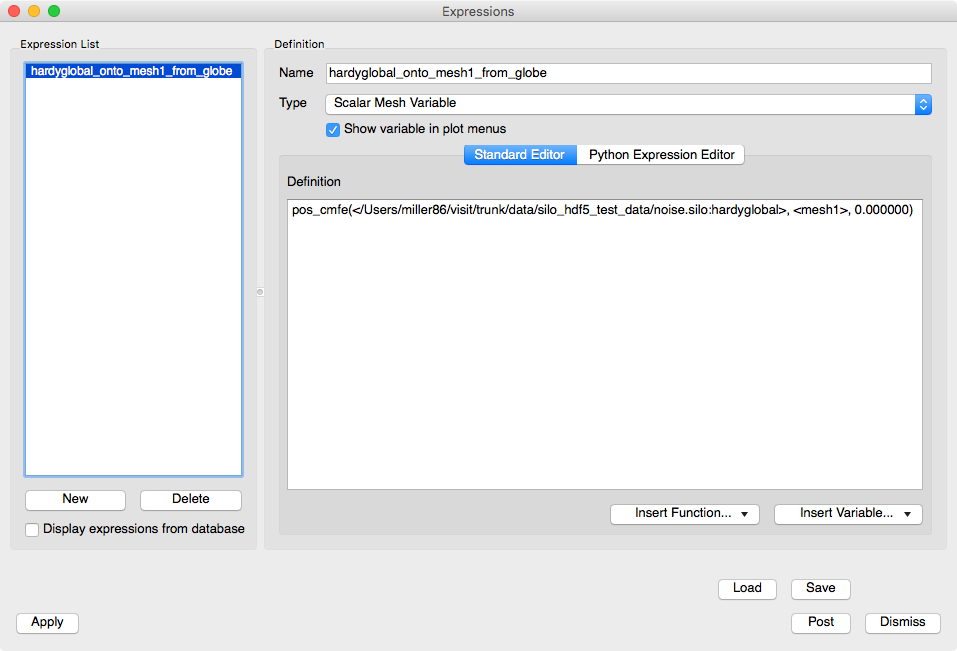
Fig. 8.91 New can be manipulated in the Expression window
In addition, this new expression can be used in other expressions. Finally, if for some reason the resulting expression is problematic, it can be deleted from the Expression system and the Data-Level Comparisons wizard can be run again to re-create it as desired.