9.4. Rendering Options
VisIt provides support for setting various global rendering options that improve quality and realism of the plots in the visualization. Specifically, VisIt provides controls that let you smooth the appearance of lines, add specular highlights, add shadows, and apply depth cueing to plots in your visualizations. The controls for setting these options are located in the Rendering options Window (see Figure 9.42) and they will be covered here while the other controls in that window will be covered in the Preferences chapter. To open the Rendering options Window, click on Rendering in the Main Window’s Preferences menu.
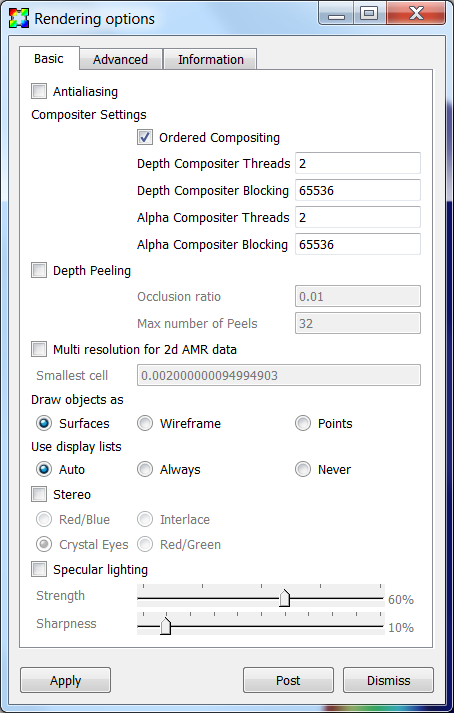
Fig. 9.42 The basic rendering options
9.4.1. Making Lines Look Smoother
Computer monitors contain an array of millions of tiny rectangular pixels that light up to form patterns which your eyes perceive as images. Lines tend to look blocky on computer monitors because they are drawn using a relatively small set of pixels. Lines can be made to look better by turning on antialiasing, as can be seen in this example (see Figure 9.43). There are two forms of antialiasing available in VisIt: MSAA (Multisample anti-aliasing) and FXAA (Fast approximate anti-aliasing). The only MSAA control is the number of multi-samples (2, 4, 6 or 8), though the actual value used will be clamped to the maximum available for your system. Depending on VisIt’s build configuration and the system on which it is running, MSAA may not be available. If this is the case, the MSAA radio button will be disabled and it’s label will be changed to MSAA (not available). The FXAA controls correspond to the available VTK options and are described in their docs for the vtkFAAOptions class. If you want to enable antialiasing, which is off by default, you check either the MSAA radio button or the FXAA radio button box located in the Antialiasing section of the Basic tab (see Figure 9.42). When antialiasing is enabled, lines and polygon edges should look smoother.
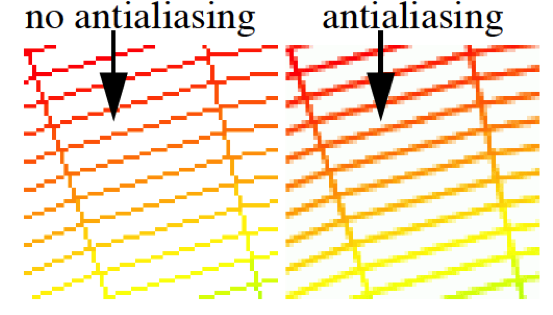
Fig. 9.43 An example of antialiasing
9.4.2. Specular Lighting
VisIt supports specular lighting, which results in bright highlights on surfaces that reflect a lot of incident light from VisIt’s light sources. Specular lighting is not handled in the Lighting Window because specular lighting is best described as a property of the material reflecting the light. The controls for specular lighting don’t control any lights but instead control the amount of specular highlighting caused by the plots. Specular lighting is not enabled by default. To enable specular lighting, click the Specular lighting check box near the bottom of the Basic tab (see Figure 9.42).
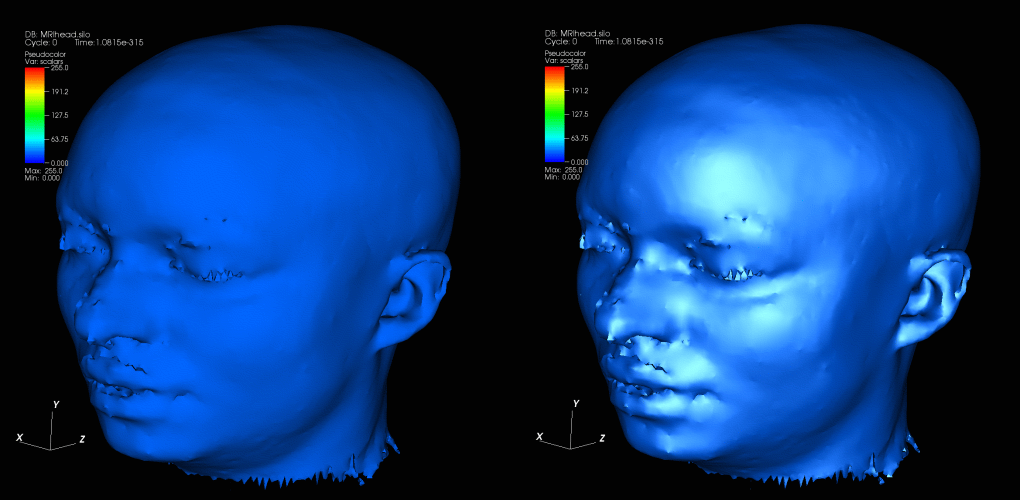
Fig. 9.44 The effects of specular lighting on plots
Once specular lighting is enabled, you can change the strength and sharpness properties of the material reflecting the light. The strength, which you can set using the Strength slider, influences how glossy the plots are and how much light is reflected off of the plots. The sharpness, which is set using the Sharpness slider, controls the locality of the reflections. Higher sharpness values result in smaller specular highlights. Specular highlights are a crucial component of lighting models and including specular lighting in your visualizations enhances their appearance by making them more realistic. Compare and contrast the plots in Figure 9.44. The plot on the left side has no specular highlights and the plot on the right side has specular highlights.
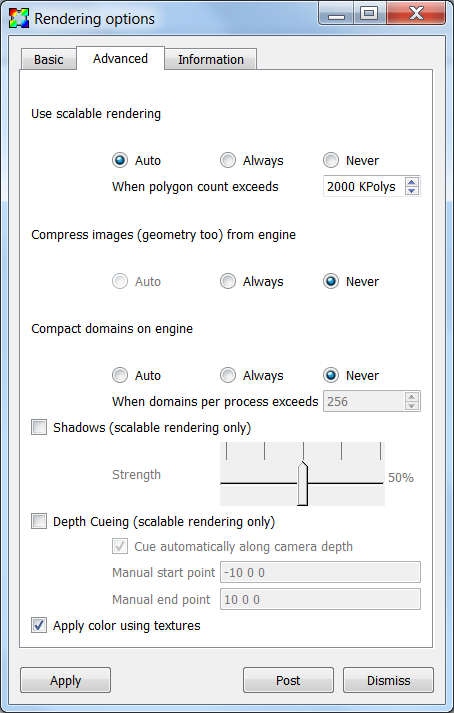
Fig. 9.45 The advanced rendering options
9.4.3. Shadows
VisIt supports shadows when scalable rendering is being used. Shadows can be useful for increasing the realism of your visualization. Shadows are applied after the opaque geometry has been rendered and before the transparent geometry is rendered. This means that transparent geometry doesn’t cast shadows and doesn’t have shadows cast on it. Currently, the shadowing implementation only uses the first light and assumes it is a directional light. The controls to turn on shadows can be found about a third of the way from the top of the Advanced tab (see Figure 9.45). To turn on shadows, you must turn on scalable rendering by clicking on the Always radio button under the Use scalable rendering label. Once scalable rendering has been turned on, the shadows controls become enabled. The default shadow strength is 50%. If you desire a stronger or weaker shadow, adjust the Strength slider until you are satisfied with the amount of shadow that appears in the visualization. The same plot is shown with and without shadows in Figure 9.46.
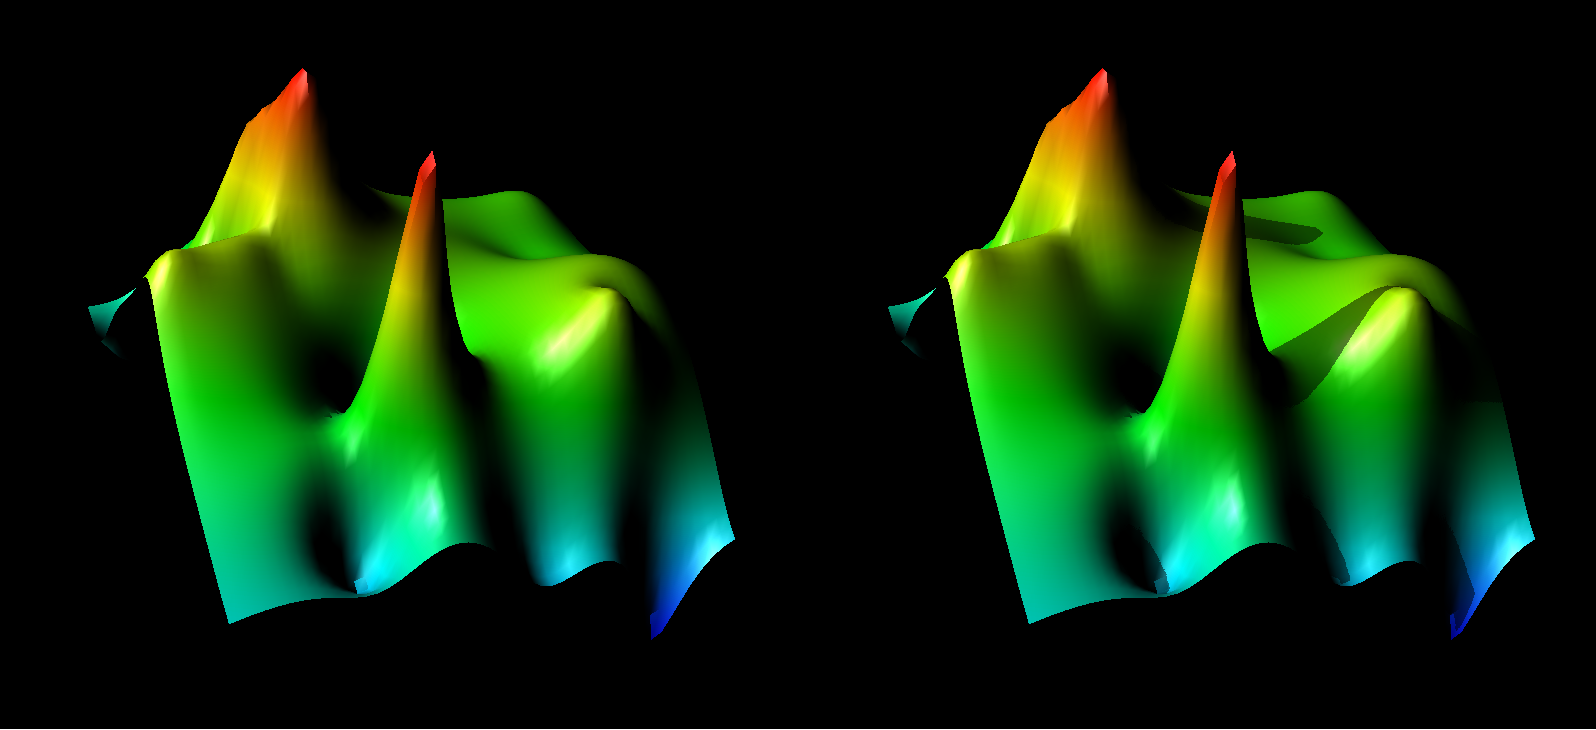
Fig. 9.46 The effects of shadows on plots
9.4.4. Depth Cueing
VisIt supports depth cueing when scalable rendering is being used. Depth cueing can be useful for increasing the realism of your visualization. Depth cueing causes objects to be blended with the background with increasing distance from the camera. Depth cueing is applied after the shadows have been applied and before the transparent geometry is rendered. This means that transparent geometry won’t be impacted by depth cueing. The controls to turn on depth cueing can be found about a third of the way from the top of the Advanced tab (see Figure 9.45). To turn on depth cueing, you must turn on scalable rendering by clicking on the Always radio button under the Use scalable rendering label. Once scalable rendering has been turned on, the depth cueing controls become enabled. By default, depth cueing is performed along the camera direction. The depth cueing can be done along a different direction by unchecking the Cue automatically along camera depth check box and then entering the coordinates defining the direction to perform the depth cueing in the Manual start point and Manual end point text fields. The coordinates are defined in the coordinate system of the simulation data. The same plot is shown with and without depth cueing in Figure 9.47.
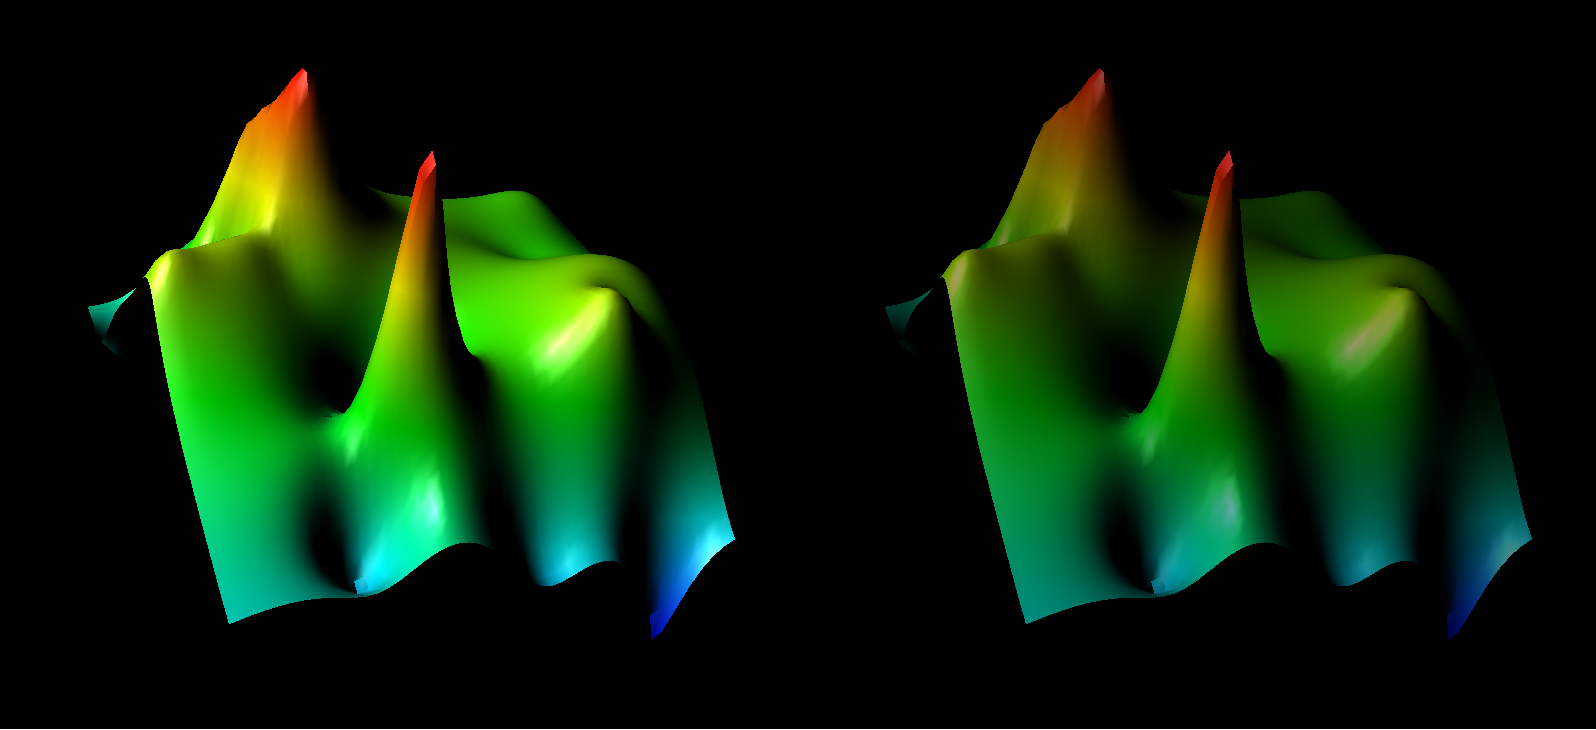
Fig. 9.47 The effects of depth cueing on plots