13. Keyframe Animation
This tutorial describes how to use keyframe animations.
There is also a video that demonstrates keyframe animation creation using a different example than what is described here.
13.1. Keyframe animation overview
Keyframing is an advanced form of animation that allows you create animations where certain animation attributes such as view or plot attributes can change as the animation progresses. You can design an entire complex animation upfront by specifying a number of animation frames to be created and then you can tell VisIt which plots exist over the animation frames and how their timestates map to the frames. You can also specify the plot attributes so they remain fixed over time or you can make individual plot and operator attributes evolve over time. With keyframing, you can make a plot fade out as the animation progresses, you can make a slice plane move, you can make the view slowly change, etc.
13.2. Using keyframe animation to do modal analysis
Modal analysis is the study of the dynamic properties of linear structures. It looks for the natural frequencies of a structure.
This tutorial demonstrates using animation to view the results of a modal analysis.
13.2.1. Creating the animation
Here we create an animation of elongating a globe using the Displace operator.
Let us start by opening a file, creating a plot, and applying the Displace operator.
Open the file
globe.silo.Create a Pseudocolor plot of
dx.Add the Displace operator.
Go to OpAtts->Transforms->Displace to bring up the Displace operator attributes window.
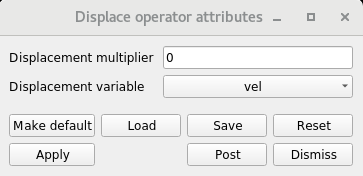
Fig. 13.17 The Displace operator attributes
Set the Displacement multiplier to
0.Set the Displacement variable to
vel.Click Apply.
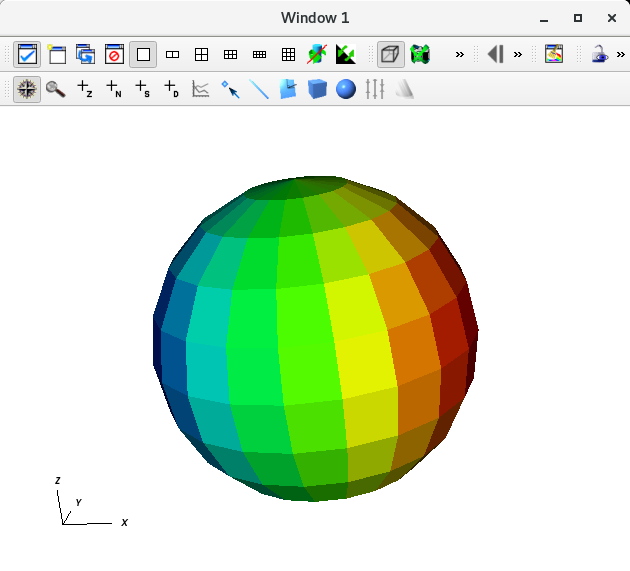
Fig. 13.18 Pseudocolor plot of dx with the Displace operator
We will now create a keyframe animation with 81 frames.
Go to Controls->Keyframing.
This will bring up the Keyframe Editor window.
Set the Number of frames to
81.Press Enter.
Toggle Keyframing enabled to on.
Click Apply.
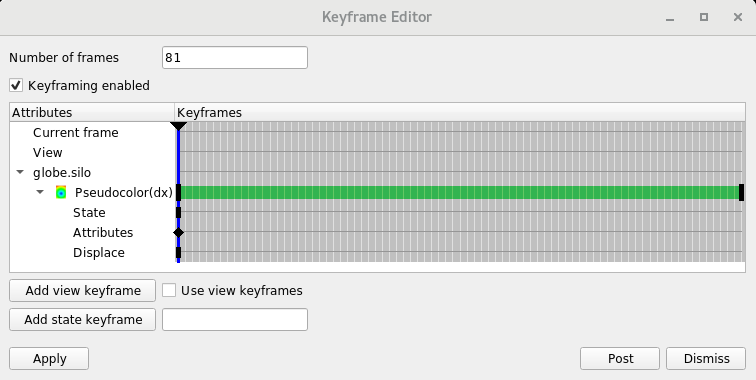
Fig. 13.19 The Keyframe Editor after creating the 81 frame animation
We will now set the Displacement multiplier to range from 0 to 1 back to 0.
Set the Time slider on the main control window to
40.Set the Displacement multiplier to
1.Click Apply.
This will create a Displace operator keyframe at frame 40.
Set the Time slider on the main control window to
80.Set the Displacement multiplier to
0.Click Apply.
This will create a Displace operator keyframe at frame 80.

Fig. 13.20 The Keyframe Editor with the three Displace operator keyframes
13.2.2. Viewing the animation
Now that we have finished creating our animation we can view it.
Set the Time slider on the main control window to
0.Click the Play button.
This will play the animation once through.
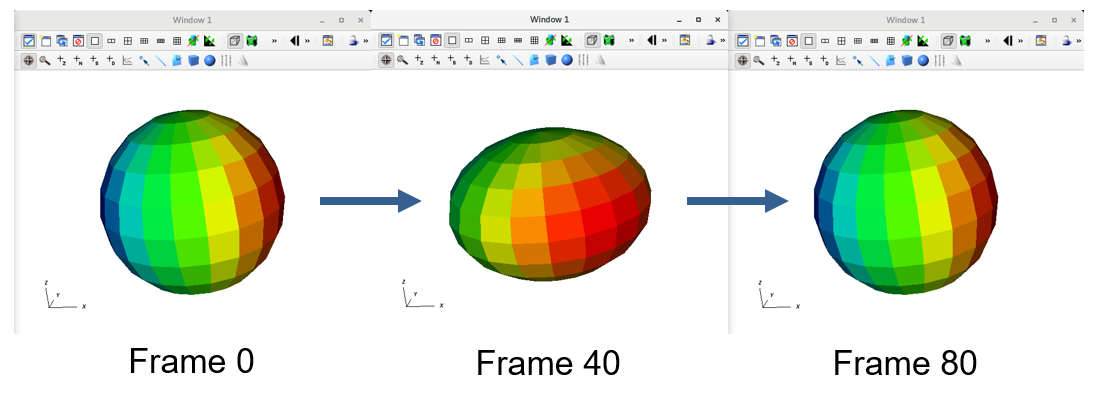
Fig. 13.21 Key frames in our animation
13.2.3. Saving the animation
We can also save the animation as a jpeg movie.
Go to File->Save movie to bring up the Save movie wizard.
Click on the Next> button to create a new simple movie.
Toggle Specify movie size to on and set the Width to
1024.Click on the -> button to move the definition to the Output list.
Click the Next> button to move to the next wizard pane.
Click the Next> button to save all the frames.
Click the Next> button to save the movie with the basename
movie.Click the Next> button to skip sending an email when the movie is completed.
Click the Finish button to create the movie.